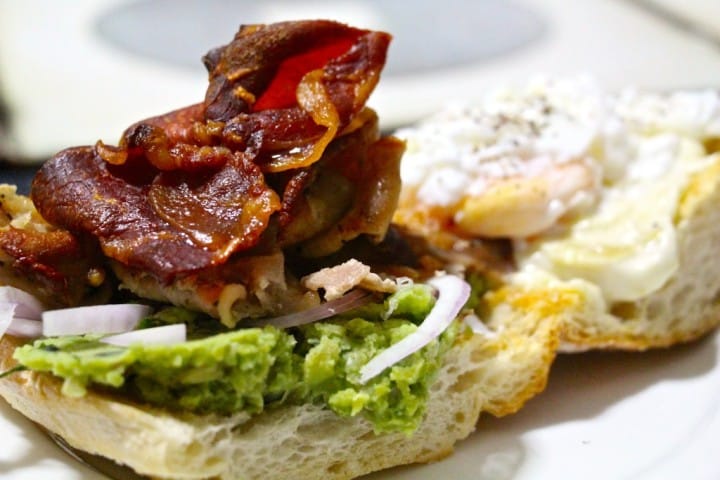
Mushy peas, bacon, garlic, and mayo sandwich: bosh, this is a beauty
Kiss me definitely NOT Sandwich – I guarantee you will stink with this one folks… but it’s worth it. Oh yeah, baby. This is a cracking sandwich, this is my Mushy peas, bacon, garlic, and mayo sandwich.

I was having lunch with my new work colleagues one day and spotted something in the menu that sounded so interesting. I didn’t actually eat the interesting option that day, but I sure did scribble down the concept for future consideration – and here it is, Mushy peas, bacon, garlic, and mayo sandwich. This got rave reviews from all who consumed it, aged from 5 to 45 years. I have to admit it was pretty damn good – the winner in this for me was the roasted garlic mayonnaise.
To make 4 quite substantial Mushy peas, bacon, garlic, and mayo sandwiches;
Phase 1 – Mushy peas;
- 2 tins of processed peas, drained and zapped in the microwave for 2-3 minutes;
- 1 good handful of roughly chopped mint;
- 2 tablespoons of olive oil;
- 2 teaspoons of lemon juice; and
- 1-2 good pinches of salt.
Very simple. Throw all the above into a bowl, and with a potato masher give them a good mashing until they form a paste-like texture. Add more oil in if the mix gets too dry. Set aside.
Phase 2 – Roasted garlic mayo (OMG!!! This is DAMN good);
- 5 whole bulbs of garlic; and
- 3/4 of a jar of mayonnaise.
Leave the garlic in their skins. Pop them on a roasting tray, drizzle olive oil on top, and in an oven @ 220 degrees for 10-15 minutes or just until they start to lightly brown. Give the sides a little squeeze and if soft you’re done. Take them out of the oven cut them in half across the horizontal and then squeeze out the soft garlic clove innards.
Have a wee taste, they’ll be not so garlic intense, almost sweet to the taste. With a fork mix the two ingredients in a bowl, using the back of the fork to squash all the cloves into a paste together with the mayo. Heavenly.
Phase 3 – Onion;
- 2 small red onions cut into thin slices.
Phase 4 – Roast pork belly & crispy bacon;
Fry or grill 8 bacon rashers until nicely crisp. Go to the supermarket to procure some roasted pork belly, and get that cut into small bite-sized pieces.
Phase 5 – Poached eggs;
- 4 sandwiches = 4 eggs
Take a big pan, fill it with water, and add a drizzle of vinegar to help the eggs ‘form’. Bring this to a boil and add in the eggs (cracked from the shells of course). Watch these as you don’t want to overcook them. Literally when the yolk has started to harden turn off the gas. You can leave the eggs in the warm water then to finish the cooking process gently.
Phase 6 – The bread;
- I used a Chapati which I cut into 4 pieces, then sliced along the horizontal. Not all the way through though as you want to retain a ‘hinge’ for the sandwich.
I laid these open on a baking tray and popped in the oven as the pork was cooking. They will crisp nicely with a little browning on them. I took them out cut a garlic clove in half and rubbed this all over the toasted bread. Basically, the roughness of the toasted bread acts as a grater so you’ll end up with garlic bread – oh yes!!!
Finally, it is construction time for my Mushy peas, bacon, garlic, and mayo sandwich;
- Take that bread and open it on the hinge;
- On one side spoon a good lump of mushy peas;
- Lay on some of the thinly sliced onion;
- Lay on some of the roasted pork belly;
- Lay on some crispy bacon;
- One the other side of the sandwich apply a thick layer of the roasted garlic mayo;
- Lay on one of the drained poached eggs;
- On top of the egg give a good sprinkle of salt and cracked black pepper.


